
How to Keep Little Kids Warm While Camping
The Sleep Dilemma
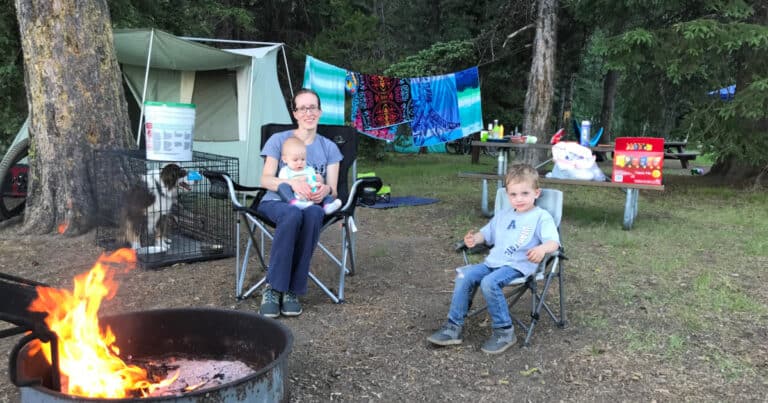
In speaking with parents that have had failed camping attempts the most common problem they report is: Sleep! With the general consensus being they aren’t getting any. These stories often conclude with the parents either ending their trip early or in some cases the parents abandoning camp in the middle of the night to go home.
Luckily it doesn’t have to be that way!! When it comes to solving the sleep dilemma, it is a two-part equation. Last week I covered the first part of that equation in my post:
6 Tips to Help Kids Sleep While Camping
This week I will be covering the second part of the equation: keeping little kids warm while camping. Because the truth is one of the main reasons kids don’t sleep while camping is because they are cold! Babies and toddlers, in particular, have a difficult time keeping their little bodies warm. This is especially true when camping at higher elevations where the temperatures can drop dramatically at night, even in the middle of the summer.
So today I am sharing with you all my tips and tricks for keeping little kids warm so that everyone can get some sleep and wakeup happy campers!
6 Tips for Keeping Little Kids Warm While Camping
Tip #1: Dress for success
Dressing kids for sleep while camping is a little bit like dressing them for cold weather play. Depending on the temperature they may need a base layer, mid-layer, and an outer layer. Below is a quick overview of each layer and what material you should use.
Base Layer: Wool or Synthetic
Mid-layer: Fleece
Outer Layer: Sleeping Bag (see Tip #4 for outer layer suggestions for babies)
Below is a simple guide on how to dress your kids based on the nighttime temperature. Please take into consideration that you may need to add or remove layers depending on how warm your child’s sleeping bag is. Before bed, be sure to lay out everything you may need so you can easily add layers in the middle of the night.
50-60 Degrees Fahrenheit: Cotton PJs + Wool Socks + Sleeping Bag
40-49 Degrees Fahrenheit: Base Layer + Wool Socks + Knit Hat + Sleeping Bag
30-39 Degrees Fahrenheit: Base Layer + Wool Socks + Fleece Pjs (over base layer) + Knit Hat + Knit Gloves + Sleeping Bag
For suggestions on which brands are best for kids’ base layer check out my post Best Winter Gear for Kids.
Here are some additional suggestions:
- If you can’t afford a wool or synthetic base layer for your kids (and who can blame you) at a minimum consider buying wool socks. We love Smartwool Socks {aff. link} but for those that have to be really budget conscience I recommend Eocom Winter Warm Wool Socks {aff. link}.
- If your toddler doesn’t like the idea of sleeping with a hat on, try haloing their head with a blanket. Some kids are more open to that arrangement, though it doesn’t stay in place as well as a hat.
- If your baby or toddler doesn’t like the idea of sleeping with gloves on, don’t stress too much. If you can keep your child’s core warm their hands will also stay relatively warm.
- When using a hat make sure it fits your child properly and isn’t so big that it can work itself down over their nose and mouth as they sleep.
- By combining Tip #1 with the additional tips in this post you may be able to get by with fewer layers (e.g. fleece pjs + hat + sleeping bag) in colder temperatures.
Tip #2: Create a Thermal Barrier
Another common issue when tent camping with little kids is the dreaded pack-n-play. While pack-n-plays can be a lifesaver when it comes to helping kids sleep while camping they have one major design flaw. That is that there is a big air space right below where your baby or toddler sleeps. As the night air cools it makes it very cold and uncomfortable for your child.
Thankfully there is a simple hack to get around this and it is actually something you can find at your local hardware store. It’s called Reflectix {aff. link}. Reflectix is something that is used in construction to insulate homes and looks a lot like the sunshades used in cars. Luckily it’s also great for creating a thermal barrier between your baby and that cold pocket of air. It comes in a roll so what you do is measure your pack-n-play and cut two strips to length. You then lay it in the bottom of the pack-n-play (fully covering the width and length) and then put the pack-n-play mattress on top. And voila the cold air pocket is no longer an issue.
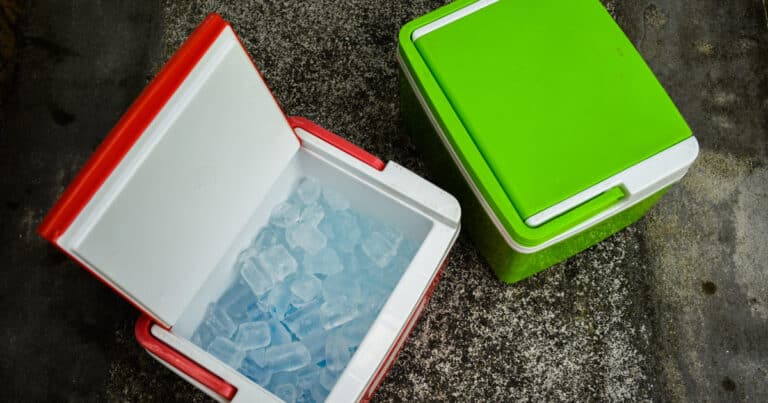
The other awesome thing about Reflectix is that it is reusable so once you buy it your good to go. You can also use it to help your ice last longer in your cooler. Woot woot! Two awesome camping hacks for the price of one. I talk more about that in my post: 13 Tips for Keeping Food Icy Cold in a Cooler
Tip #3: Put the sleeping pad inside the sleeping bag
Another challenge can be keeping your kiddo in their sleeping bag. The combination of the slick fabric of the sleeping bag and the sleeping pad often means your kids will wiggle their way out of their sleeping bag during the night or will wiggle their way onto the cold tent floor. Having personally spent an entire night putting Madic back in his sleeping bag (while 36 weeks pregnant mind you) I don’t recommend it.
One trick I recently learned to avoid this is to put your child’s sleeping pad INSIDE their sleeping bag. This makes a night and day difference when it comes to helping your kids stay in their sleeping bags and on their sleeping pad. If you want to get really fancy you could even check out the Big Agnes Duster. This bag has a sleeve on the back that you can use to insert the sleeping pad so it stays in place. The bag is even designed to grow with your child. How cool is that?!
Note: If your child uses an air-filled sleeping pad, I would recommend putting a blanket between your child and the pad in cooler weather (i.e. below 50 degrees at night).
Tip #4: Invest in a Wearable Sleeping Bag
Another dilemma with taking babies camping is that kids before age one aren’t supposed to sleep with blankets in their sleep space. Lucky for us, Morrison Outdoors has come up with a solution. This amazing company has designed wearable sleeping bags {aff. link} for babies age 6 months to 24 months and for toddlers age 2 to 4 years. Both sizes come in two temperature ratings. A 20 degree down sleeping bag or a 40 degree sleeping bag. And they are designed to meet AAP-guidelines for safe infant sleep (think sleep sack on steroids).
It can be hard to buy quality outdoor gear for little kids when you know they will quickly outgrow it but Morrison has taken that into account. They have an awesome Trade In Program where you can trade in your sleeping bag and get cashback.
Now you may be wondering, can’t I just use my baby’s snowsuit? While using your baby’s snowsuit as a wearable sleeping bag will work in a pinch it doesn’t meet AAP-guidelines for safe infant sleep. The main culprit is the hood. Most babies are stomach sleepers which causes the hood to fall over their face when it is turned to the side. I personally have used a snowsuit before as a wearable sleeping bag and I can attest I spent the whole night checking to make sure Emma could breathe. It was that sleepless night that lead me to invest in a wearable sleeping bag.
You may also be thinking, can’t I just put my young toddler in a nice down sleeping bag? Yes, you can put your toddler in a sleeping bag, but that can pose some challenges. If your toddler is still sleeping in a crib at home the transition to sleeping on the floor for camping can be disastrous. For the best chance at a good night’s rest you want to duplicate your child’s at-home sleep environment as much as possible and last I checked most sleeping bags won’t fit in a portable crib.
Tip #5: Get a Sleeping Bag that fits
For older children that have graduated from the pack-n-play you will want to keep the following in mind.
If you put a little kid in an adult size sleeping bag they will get cold. The problem is their body can’t heat that large of a space to keep warm. The ideal solution is to either buy or borrow a sleeping bag that fits your child. If that is not an option then the next best solution is to put them in an adult size sleeping bag and then fill the excess space with blankets.
Tip #6: Get a tent heater
Another option for keeping things toasty when you are camping is to look at investing in a propane tent heater. Tent heaters are nice for extending your camping season. But you may be wondering is it safe to use a tent heater? The short answer is yes! As long as you use per the manufacturer’s guidelines. We got the Mr. Heater Buddy {aff. link} and it works like a charm. Here are some things to keep in mind when buying a propane tent heater:
- Make sure to get a heater that has been rated for indoor use.
- Be sure to check the maximum elevation rating. Most propane tent heaters will only work up to 7,000′ in elevation. Depending on where you live that may pose a problem if the campgrounds you frequent are higher than 7,000′ in elevation. The elevation rating is important because most propane tent heaters have O2 sensors. When used at a higher elevation than what they are rated for, the O2 sensor will think there isn’t enough oxygen for the heater to run and it will shut off.
- Propane usage. Unless you bring a big propane tank there won’t be enough fuel for your heater to run for an extended period of time so it is important to still plan for some cold weather camping. The coldest time of the night is at dawn so one recommendation is to run it when everyone is going to bed and then turn it back on around 5-6 am.
- Make sure your tent is well ventilated when in use. It might seem counterintutive to open your tent fly when you are trying to keep your tent warm but it is not safe to use a propane heater in an enclosed space without proper ventilation.
- Position your tent heater where it won’t come in contact with the tent, sleeping bags, or clothes.
Happy Camping Adventures!
I hope you found these tips helpful. Using these tips and tricks has made a huge difference in our camping experience. I know they will for you too!
If you enjoyed this post you can use the buttons below to share it with friends or you can pin it for future reference. Which tip(s) do you plan on trying on your next camping trip?!
Disclaimer: I am a participant in the Amazon Services LLC Associates Program, an affiliate advertising program designed to provide a means for me to earn fees by linking to Amazon.com and affiliated sites. As an Amazon Associate, I earn from qualifying purchases.